Calming My Sensitive Skin with Paula's Choice.

SPONSORED

My skin is sensitive enough and the outdoor cold and indoor heat during the winter seems to make it even more sensitive. You see, I have rosacea. It's not something I talk about too much as I've just dealt with it. Ever since I have been in high school I've just covered up the redness on my cheeks with makeup and didn't give it much thought. As I have gotten older, my rosacea has become more of an issue and I am having to deal with it, especially this winter. I was recently given the opportunity to try the Paula's Choice Redness Relief Kit from her Calm line and I was thrilled because I am at the point where I need to face my sensitive skin head on once and for all.

Paula's Choice Redness Relief Kit contains six products that make up a complete five-step skin care routine (there are two moisturizers in the kit; one for day and one for night). There are two different kits to choose from — one for Normal to Dry skin and one for Normal to Oily skin. I'm very dry, so I obviously chose the Normal to Dry kit.

The kit comes elegantly packaged in a nice silver box with the products and ingredients listed on the back in plain sight. I love how Paula's Choice is very clear about all of the ingredients in her products in a pretty no-nonsense way. 

Inside the box were the products, which are all in silver and quite elegant and upscale in look and feel which, of course, I love. The products include:

Calm Redness Relief Cleanser, Normal to Dry
Calm Redness Relief Toner, Normal to Dry
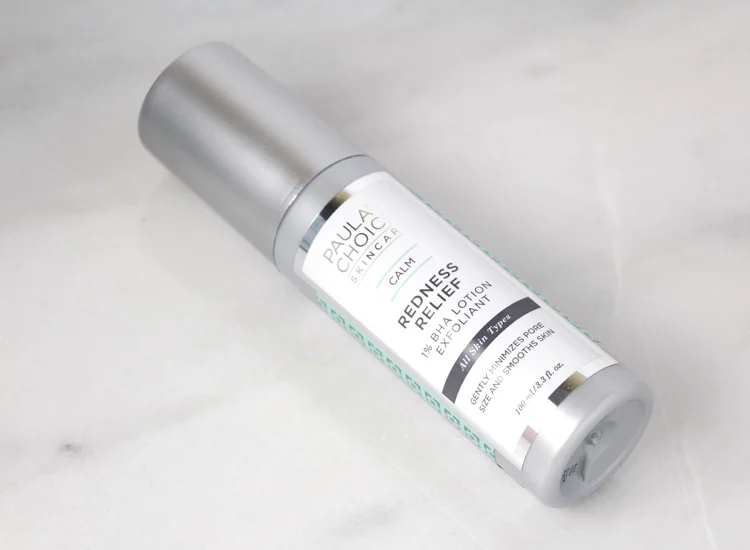
Calm Redness Relief Relief 1% Exfoliant BHA Lotion Exfoliant
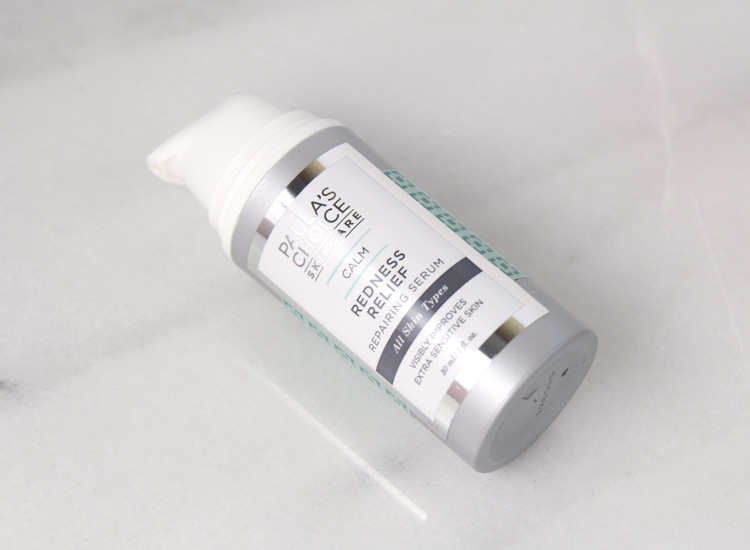
Calm Redness Relief Repairing Serum
Calm Redness Relief SPF 30 Mineral Moisturizer (Day Moisturizer)
Calm Redness Relief Moisturizer (Night Moisturizer)

Starting my routine with the Redness Relief Cleanser, my skin feels immediately soothed. The cleanser is creamy so it feels nourishing and foams up lightly. I like that it doesn't feel stripped after using. Skin is left thoroughly cleansed, with all makeup (even tougher mascara) removed without much effort.

The second step in the routine is the Redness Relief Toner. This is one of the parts in my routine where I was probably going wrong before; I normally use a toner that contains witch hazel and alcohol and I just learned that is not so good for sensitive skin. This toner has glide to it that seems to add moisture to my skin and again, feels soothing as it swipe it over my cleansed skin with a cotton pad. I only need a little bit to get that extra fresh and clean feel that a toner gives.

Next up is the exfoliating step in the routine, which is my favorite step. When you are big on anti-aging like I am, you know what a vital part of the routine this is. I am use to using 8% and 10% exfoliants — another problem. I was probably using too strong of an exfoliant and the wrong type of an exfoliant for my sensitive skin. This is a 1% BHA Lotion Exfoliant and I'm happy to say that this lightweight lotion is exactly the exfoliant that my skin has been needing. It is strong enough to get rid of the roughness that my skin has without aggravating it one bit. It is super gentle, yet still exfoliating away dead skin cells which is so vital to keeping skin fresh and glowing.

I think that the Redness Relief Repairing Serum , which I use next, has been the key to calming the redness in my skin. Since I have been using all of the products, particularly immediately after applying the serum, I notice that the redness on my cheeks are diminished. With a blend of targeted ingredients, it reduces inflammation and starts to repair skin. I love how it feels on my skin; it is so creamy smooth and hydrating as I apply it to my face and neck. One pump covers my face and one pump covers my neck. I use this serum twice a day and I feel like my skin is just drinking this in and putting it to work.

Finishing off the routine is a day or night moisturizer. For day it is the Redness Relief SPF 30 Mineral Moisturizer and night it is the Redness Relief Moisturizer . I am SO picky about my day moisturizer and this one passes the test. It is lightweight and almost milky out of the tube, but it blends into my skin and absorbs quick while leaving my skin feeling super hydrated. It does not interfere with makeup application or aggravate my skin at all. It is made with plant extracts, antioxidants and peptides to help calm the skin. It has SPF 30 which is a must. At night, when my skin usually feels its most sensitive, I use the Redness Relief Moisturizer which is definitely a night cream and is dreamy. It is much thicker than the day moisturizer and really calming and soothing on the skin. This one is made with plant oils, antioxidants and emollients to repair the skin. It is the perfect amount of hydration for night and leaves my skin feeling like silk.

Overall, I am more than happy that I got to test the Redness Relief products and will continue to use them. I know that I will be re-purchasing a few of them for sure. The Serum, Exfoliant and Moisturizers are must-haves for me. My skin is not only more smooth, it is not nearly as sensitive as it was a few weeks ago before I started testing. As I said, I think the Redness Relief Repairing Serum is the key to reducing redness in my skin. I feel as I don't have to use as much makeup to cover up since I have been using the products in the Paula's Choice Redness Relief Kit as well.

Is your skin super sensitive? Do you think you might have rosacea? Here are the signs to look for: Rosacea signs .

I think you'd benefit from the products in the Paula's Choice Calm line if you have sensitive skin or rosacea. Through my partnership with Pretty In My Pocket (PRIMP) I’m able to offer you 20% off + free shipping on your first purchase at Paula's Choice ! Just be sure to shop through this link . While you are at it, download the PRIMP app for more great beauty product reviews, tips and savings.

Enter for a chance to win your very own Paula's Choice Skin Care Regime below.

This post is brought to you by Paula's Choice and PRIMP. Opinions are 100% my own. #KeepCalmAndSoothOn #PaulasChoiceSkinCare #PaulasChoice

Urban Decay UD XX - 20 Years of Beauty with an Edge + My Favorite Urban Decay Products.

Can you believe that Urban Decay is celebrating their 20 year anniversary? It seems like just yesterday that the 'beauty with an edge' brand launched in 1996 with just 10 lipsticks and 12 nail enamels. I remember their early years and nail enamels that really shook up the industry with their edgy names. The brand has certainly grown over the years and has become adored by millions of women around the globe. I am one of them. In celebration of this milestone, Urban Decay has launched a really special vault called UD XX - 20 Years of Beauty with an Edge.

UD XX - 20 Years of Beauty with an Edge

UD XX contains 20 shades of Eyeshadow and 20 shades of 24/7 Glide-On Eye Pencil that span the brand’s entire 20-year history which is pretty bittersweet. It includes everything from the brands best selling shades and new shades to vintage shades like UV-B along with cult classics like Covet and Lucky too.  The range in shades is astounding and goes from from neutral to bright and dark to light with an array of finishes that you can never be bored.

UD XX shades:

Eyeshadows: Oil Slick, Roadstripe, ABC Gum, Shattered, Grifter, Gunmetal, Polyester Bride, Baked, Mildew, Asphyxia, Mushroom, Midnight Cowboy, Smog, Lounge, Flash, Vapor, YDK, Roach, UV-B and Last Call.

24/7 Glide-On Eye Pencils: Zero, Oil Slick, Gunmetal, Mushroom, Whiskey, Roach, Smog, Lucky, Midnight Cowboy, Underground, Stash, Mildew, Covet, Deep End, UV-B, Deviant, Asphyxia, Ransom, Last Call and Crash.

This vault is a super limited edition and only available at urbandecay.com and Sephora. It's pricey at $375 but it's the ultimate for the true Urban Decay fan.

My Favorite Urban Decay Products

I thought it would be fun to share some of my favorite Urban Decay products in celebration of this special time. I use so many of them regularly.

Urban Decay Naked Smoky Palette - I use this a few times a week. It contains all of the shadows I need to create the perfect eye look, from everyday to soft and smoky to full on smoky.

Urban Decay Primer Potion - This is my eyeshadow primer of choice. I think I have used all of the different formulas/shades. It's simply the best.

Urban Decay Liar Naked Lipgloss - I have this on my vanity and in my purse. It's the perfect shade of gloss for me.

Urban Decay 24/7 Glide-On Eye Pencil - I own multiple shades and just love this long-lasting easy to apply liner.

Urban Decay NAKED Basics Palette - Could it get any better than this basic eyeshadow palette? I think everyone needs to own this one. It's perfect for everyday and as a base to any shadow look.

Urban Decay NAKED on the Run - This palette is my ultimate travel palette and I bring it with me everywhere. It has just the right shadows, blush and bronzer shades along with a great gloss. My mascara has gone bad a long time ago, but the rest is perfect.

Urban Decay NAKED 3 Palette - Honestly, I could have all of the NAKED palettes on my favorites list, but this is the one I pull out the most. I just love the rose-hued neutrals and they are so versatile. I had to buy another because I hit pan on many of the shades in my original.

What are you favorite Urban Decay products?

Top 10 Makeup Hacks.

While I may have shared a lot of makeup and beauty tips over the years, I don't think I have ever shared my top beauty tips or hacks that I most often use. As it's a top ten day, I'm going to share the top makeup tips and tricks that I have learned and used over the years (some a very long time) that are real time, and in some cases, money savers.

Top 10 Makeup Hacks to Save You Time and Money

My top ten makeup hacks:

1. Mix concealer with eye cream to help concealer from settling into fine lines. It helps to further brighten up the eye area too.

2. Warm up your pencil eyeliner with a lighter. I’ve been doing this since high school! It turns the eyeliner into a gel-like formula and helps it apply and smudge easier too.

3. Make your own BB Cream! Mix an equal amount of your favorite moisturizer (with SPF of course) with your favorite liquid illuminator — about the size of a nickel of each will work. Then add about a pea-size amount of your favorite concealer to that. I swear by this in the summer months.

4. Use concealer in the center of your lips to make them appear fuller. Simply dot a bit of concealer in the center of your lips then blend it in with the warmth of your fingertip. Top with a pearl or nude lip gloss for a perfect plump pout.

5. Make your own custom tinted lip balm by mixing Vaseline (yes, good ole’ Petroleum Jelly) with your favorite loose pigments.

6. Add a few drops of saline solution to mascara that is dry or clumpy to thin it out. Don’t mistake this for extending the life of your mascara — you still need to throw it away after three months — but this helps with drier or more clumpy formulas.

7. Forgot all those fancy contour tutorials! Simply apply bronzer in the shape of a number three (or a backwards three) on your forehead, cheekbones and jawline for an easy contoured look.

8. For a quick, smoky eye look, after you apply your shadow, use your ring finger to apply a dark shadow right at the upper and lower lash line. Smudge the lower lash line again with your finger. I almost always apply my shadow to my lower lash line with my finger and smudge; it’s so routine that it took me a few minutes to realize it was probably unconventional and a makeup hack.

9. Use a nude colored eyeliner on the inner rims of the eyes (otherwise known as your waterline) to open up the eyes and make eyes look larger.

10. Get an instant eye lift! Add a dab of liquid highlighter above the arch of your eyebrows and blend over the outer part of your brow - simple!

6 Comments

Teri Cosenzi

I'm Teri, your resident beauty expert. While I'm not playing with beauty products, painting my nails or shopping for makeup with my daughter who loves trying products with me, you will probably find me sneaking off to Florida with my husband of over 25 years or cheering on one of my three sons. I like baking, re-decorating, drinking tea, fussing with my flowers and facials.